It’s time.
You’ve long pondered at the miracle that is the night sky, enraptured by the twinkling heavens that rest above you, perhaps for too long, and you’re ready—eager even, to reach out and grab them. You make the decision, go online, and instead of immediately discovering the perfect telescope that will bring the stars to your fingertips you find a complex list of models, options, accessories, and it’s all too much. You don’t even know where to start, or what you’re looking for, and after being practically assaulted by an onslaught of an ever increasing shopping cart, you give up, overwhelmed. The floodgates are keeping you at bay.
A secret: Astronomy is not about instant gratification. It’s about patience, about building a relationship—a sense of wonder—with the universe around you.
You have to know, first and foremost, what it is you want to accomplish.
Purpose, portability, and budget
There are two main reasons that people enter the hobby of amateur astronomy: visual astronomy, or a fascination with the stars that drives you a want to be closer to them, or astrophotography, the art of capturing images of planets, galaxy clusters, and nebulae, and refining them into wondrous, colorful, photographs that leave viewers in awe. Unfortunately, astrophotography is complex, and if you’re a first time buyer it will be best to moderate yourself and your expectations, and to take it slow. It’s best to start with visual astronomy, practicing and learning how to operate your telescope, and when you’re ready, move on to capturing images.
After all, a good general rule for amateur astronomy is that there’s always room to grow, so start simple, and work your way up. Try to move too quickly, and you might find yourself stuck with what is known as a “hobby killer”: either a cheap telescope that’s prone to breaking, and is incapable of accomplishing much, or is a top of the line, complex and hard to operate telescope meant for serious professionals that you find yourself overwhelmed and frustrated with.
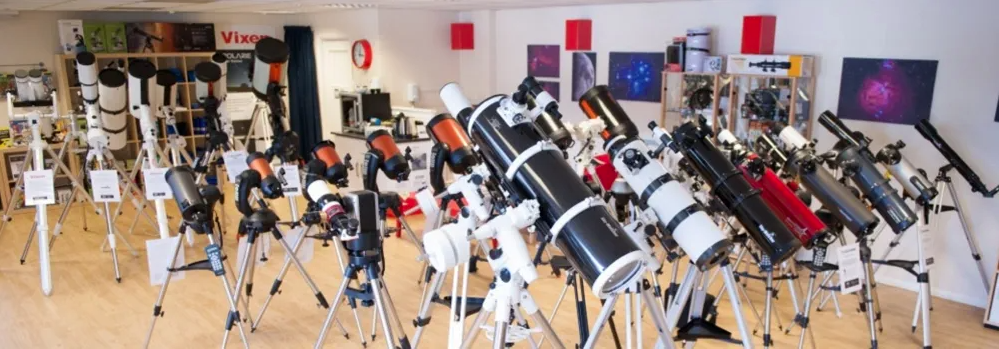
Before you know what you want, you have to know why you want it. After all, different telescopes succeed better at different things; some are better at viewing the Moon, stars, and close planets, while others are more suited for deep sky observation of galaxies and nebulae. A common mistake that first time telescope buyers make is in purchasing a telescope that doesn’t fit their needs, or is too large, so it ends up tucked away in a closet, or the garage, never to be touched again. And that’s not to mention the cost—it’s no secret that telescopes are expensive, and for a serviceable telescope that won’t let you down, but also won’t break your bank, expect to spend somewhere in the range of $300-700. And… take a breath here… that’s not including the mount—a necessity that is just as important, and can be just as expensive—as your telescope, or additional accessories such as eyepieces, finder scopes, or filters. Ideally, your first purchase will be something of reasonable price and operation, and because the best observation occurs in areas with limited light pollution, you’ll also want a telescope with a compact design that will allow for portability, reduce your labor, and will keep you motivated to learn more.
If you find that it’s not within your budget to spend a couple of hundred dollars on a telescope and some basic equipment, that’s okay. It’s better to wait and save for something that will make you happy and that you’ll get maximum use out of. Avoid the temptation to purchase a cheap $100 department store telescope, unless you intend it to be a play toy to endear them to the hobby at a young age, although many worthwhile telescopes are sturdy and suitable for children as young as six or seven with proper supervision. If you’re looking to purchase for yourself, you’ll be better of investing in a decent set of binoculars, which will cost you on average anywhere between $30-150, and a star atlas.
Binoculars are a great entry point into stargazing, allowing you to get a close view of the moon, stars, and even some planets, all while familiarizing yourself with the orientation of the night sky. Typically, the best binoculars for stargazing will be 7X35 with a wide field of view, meaning that they have a low magnification of 7 power, with lens diameter of 35 mm. Anything more than this might become unwieldy, weighing your arms down and decreasing stability. An added bonus is that they will come in handy when you save up enough for your telescope too, as binoculars are a helpful aid in properly aiming your telescope as they have wider fields of view, making it much easier to initially locate your celestial objective.
Telescope types: A brief overview
There are three basic types of telescopes: Refractors, Reflectors, and Catadioptrics.
Refractors are your standard lens based telescope, which take in light through an optical lens at the front of the scope, feeding it straight to the eyepiece. Refractors are best suited for viewing stars, the moon, and nearby planets. While you can find Refractor Telescopes for as cheap as $100, they run the risk of damage due to plastic components and will most likely disappoint, so will most likely want to find something in the $300 range. Remember, with telescopes you get what you pay for. Refractors are good telescopes for older children and beginners, because the immobile lens means less maintenance. You’ll want to look for Refractors with an optical lens diameter of at least 60-70 mm, going no larger than 4”, as the telescopes tube length and price dramatically increases in proportion to lens size, making them unwieldy and ultimately expensive for what you get out of them.
Refractors also suffer from Chromatic Aberration, or a purple-ish hazing around the edges of objects. While this might not be a problem for some beginners, eventually this will become undesirable, and is solved with either an Achromatic or Apochromatic Refractor, which each contain two or three extra lenses designed to counter the effects of Chromatic Aberration. However, Achromatic Refractors typically increase in price by hundreds of dollars, while Apochromatic Refractors can easily run into the thousands, as lens based telescopes cost more to manufacture, but they do provide nice crisp imaging.
Reflector Telescopes, on the other hand, are mirror based. Light enters the telescope through an open-aired optical tube where it is fed into a primary optical mirror and reflected to a secondary mirror which feeds the image back to an eyepiece at the top of the telescope. This allows for shorter optical tube length, and a more compact design. Reflectors are best suited for deep-sky observation, such as distant planets, galaxies, and nebulae. Reflector Telescopes are cheaper to manufacture, and will provide you with the most bang for your buck. The biggest downside to Reflector Telescopes is that the mirrors tend to become displaced, especially with transport, and will often need to be realigned, a process called collimation. Because of the mirror based design, they also invert their imaging so that objects appear upside down, although this matters very little as the orientation of objects in space is simply a matter of perspective. You’ll want to look for a Reflector with at least a 6” optical mirror, which will typically start out at around $300.
One of the best telescopes for beginners is the Dobsonian Reflector, which is designed with a built in mount, making it very portable and easy to use, and start at around $450.
Finally, we have the Catadioptric Telescope, which blends the design of the Refractor and the Reflector, accepting light through a lens at the front of the scope, and feeding it to a primary and secondary mirror before sending the light to the eyepiece. Because of the merged design, Catadioptric Telescopes are the most advanced of the three options, and are also the most versatile, capable of both terrestrial and deep-sky observation. Like Reflectors, Catadioptric Telescopes require collimation, although with far less frequency. Again, you get what you pay for with telescopes, and Catadioptric Telescopes reflect that, starting out at around $600-700, and as such are the best telescopes for the more serious and practiced amateur astronomer.
Optics
Undoubtedly, the central measure to consider with any telescope are its optical capabilities, particularly its Aperture. A telescope’s main function is to collect and focus light, which is determined by the diameter of the objective lens in Refractors, and the diameter of the objective mirror in Reflectors. The larger the diameter, the larger the Aperture, which also directly corresponds to a telescopes size and price. Generally, the goal is to obtain the largest Aperture in a telescope that your budget allows.
The second thing you want to consider is a telescope’s Focal Length, which is determined by measuring the distance that it takes for light to come into focus. In Refractors, the Focal Length matched the length of the optical tube. However, in Reflectors and Catadioptrics the light path is folded as it is reflected along the mirrors, and as such so is the Focal Length. The longer the Focal Length, the greater a telescope’s magnification power. Shorter Focal Lengths are ideal for viewing the Moon and star clusters, while longer Focal Lengths are ideal for planets and their moons, galaxies, and nebulae.
Mounts
Often times as important as the telescope itself, mounts provide stability and movement control for your telescope, and are not something you want to skimp on. A proper and decent mount often times can be the determining factor in the level of enjoyment that you receive from using your telescope, and a cheaply made mount just means added and unnecessary frustration.
°There are two types of mounts: Alt-Azimuth and Equatorial.
Alt-Azimuth mounts function similarly to a Lazy Susan, with a rotating base and a vertical altitude adjustment. They are easier to use, and generally recommended for beginners, although they are somewhat less effective, particularly for astrophotography, as celestial bodies curve through the sky at a rate of 15° per hour and the Alt-Azimuth will eventually need to be physically moved to track an object for an extended period. The Dobsonion Telescope—convenient, and highly recommended for beginners—comes equipped with a built in Alt-Azimuth mount.
Equatorial mounts are somewhat complicated for novice amateur-astronomers and children, as it requires your telescope to be aligned with the nearest polar axis. It can take some practice to get used to the set up and alignment of Equatorial Mounts, but they allow you to track celestial bodies for extended periods of time without relocating your setup, and are absolutely necessary for long exposure astrophotography.
If your budget permits it, you might also consider a Computerized Mount, also known as a Go-To Mount, which erases the work in locating skyward objects through the use of an automated tracking and finding computer—all you have to do is request the object you’re looking for. While super convenient, they are expensive, and many amateur astronomers find they steal away the challenge and wonder that comes with learning how to navigate the night sky.
Eyepieces
Eyepieces are interchangeable and function as additional magnification for the image relayed by your telescope, as well as a means to adjust your telescope’s field of view. Just like telescopes, eyepieces have their own individual focal lengths, and the shorter an eyepiece’s focal length, the greater the magnification. You can determine the magnification by dividing the focal length of your telescope by the focal length of an eyepiece. Keep in mind that an images brightness will decrease with each increase in magnification, so there is a tradeoff here.
Eyepieces are also responsible for determining the field of view seen through the telescope, meaning the larger an eyepiece’s field of view, the more of the sky becomes visible to you. Wide angle eyepieces are necessary to view larger celestial bodies, such as galaxies and nebulae in full. Read our guide to understanding eyepieces if you want more info!